Table of Contents
A. General Information
A. Dotnetnuke Information
To install this module you must have a working version of Dotnetnuke already installed. If you need help installing Dotnetnuke, follow the instructions in Video-Library. Below are all the useful links for Dotnetnuke information.
- How to install a Module in DotNetNuke 7
- How to move a module in DotNetNuke 7
- Introduction to DNN 7 Control Panel
- How to add a page in DotNetNuke 7
B. Description
PhotoAlbums is an album module with multiple skins and effects. This module integrates features of Article module and Gallery module. It has advanced features (like multi-user operations, changeable skins and effects etc) and common features as ordinary articles (like posts sharing, posts comments etc). It is a perfect integration of xBlog and DNNGallery modules with stronger album access permission, album SEO optimization as well as album displaying effect.
We will offer a regular update with fresh album effects or album skins on a weekly basis, you can enjoy this value-added service free of charge.
Features
- Support browsers ie7-10, Firefox, Chrome, Safari.
- Support multiple album effects, support to add more album skins.
- Support transition to different themes with single photo album.
- Support jQuery validation Engine, friendly and secure authentication.
- Support SEO optimization.
- Support Friendly URL to make your albums easier to be collected.
- Support multi-user albums to compose articles.
- Support photo albums comments, support to identify spam comments through filter.
- Support photo album sharing to share to major social websites.
- Support to install multiple PhotoAlbums modules in one page.
C. What Are The Requirements To Use PhotoAlbums
To use PhotoAlbums, you must be running DNN 5.x or higher. We have tested it with DNN5.x, DNN6.x and DNN7.x.
D. PhotoAlbums Installation
You can install the module in two ways: through DNN, or via FTP. Please see the following sections for each method. If you have trouble installing the module via DNN, please proceed with installing it via FTP and you will be able to get around the issue.
A1. Dotnetnuke Installation
Follow the steps below to install via Dotnetnuke.
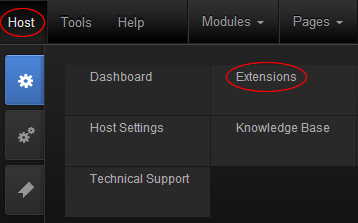
- Navigate to Host > Extensions.
- Click Install Extension Wizard and hit the Choose File button.
- Navigate to find the "DNNGo_PhotoAlbums_x.x.x_PA.zip" file on your computer and click "Next" button.
- The module will be uploaded and installed.
A2. FTP Installation
Follow the steps below to install via FTP.
- Log into your hosting space via an FTP software.
- Upload DNNGo_PhotoAlbums_x.x.x_PA.zip to folder under \Install\Module.
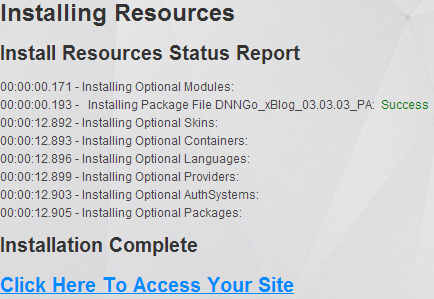
- Now you can automatically install the modules by typing the following url into your browser address bar: http://www.mysite.com/install/install.aspx?mode=installresources.
B. Module Information
You will see four modules on Extensions page after the module installation, they are:
- DNNGo PhotoAlbums - This is the main module which could be used to display the photo album list and photo album details, also you can use it to add data.
- DNNGO PhotoAlbums Calendar - It is used to display photo album in some day.
- DNNGO PhotoAlbums DashBoard - This module contains many functions, like Archive, PhotoList, RankingList, Category, Tags, image rotating effect.
- DNNGO PhotoAlbums Search - You can use it to search the photo album under the main module.
C. DNNGo PhotoAlbums Module
This is the main module, which can be used to display photo album list and photo album details, also you can use it to add data. It contains various setting options and allows to install multiple main modules on DNN, there won't be any enfluence between them.
C1. Setting Up New photo album
Please log in to DNN using admin account and add DNNGo PhotoAlbums to a Pane.
- Click New Item
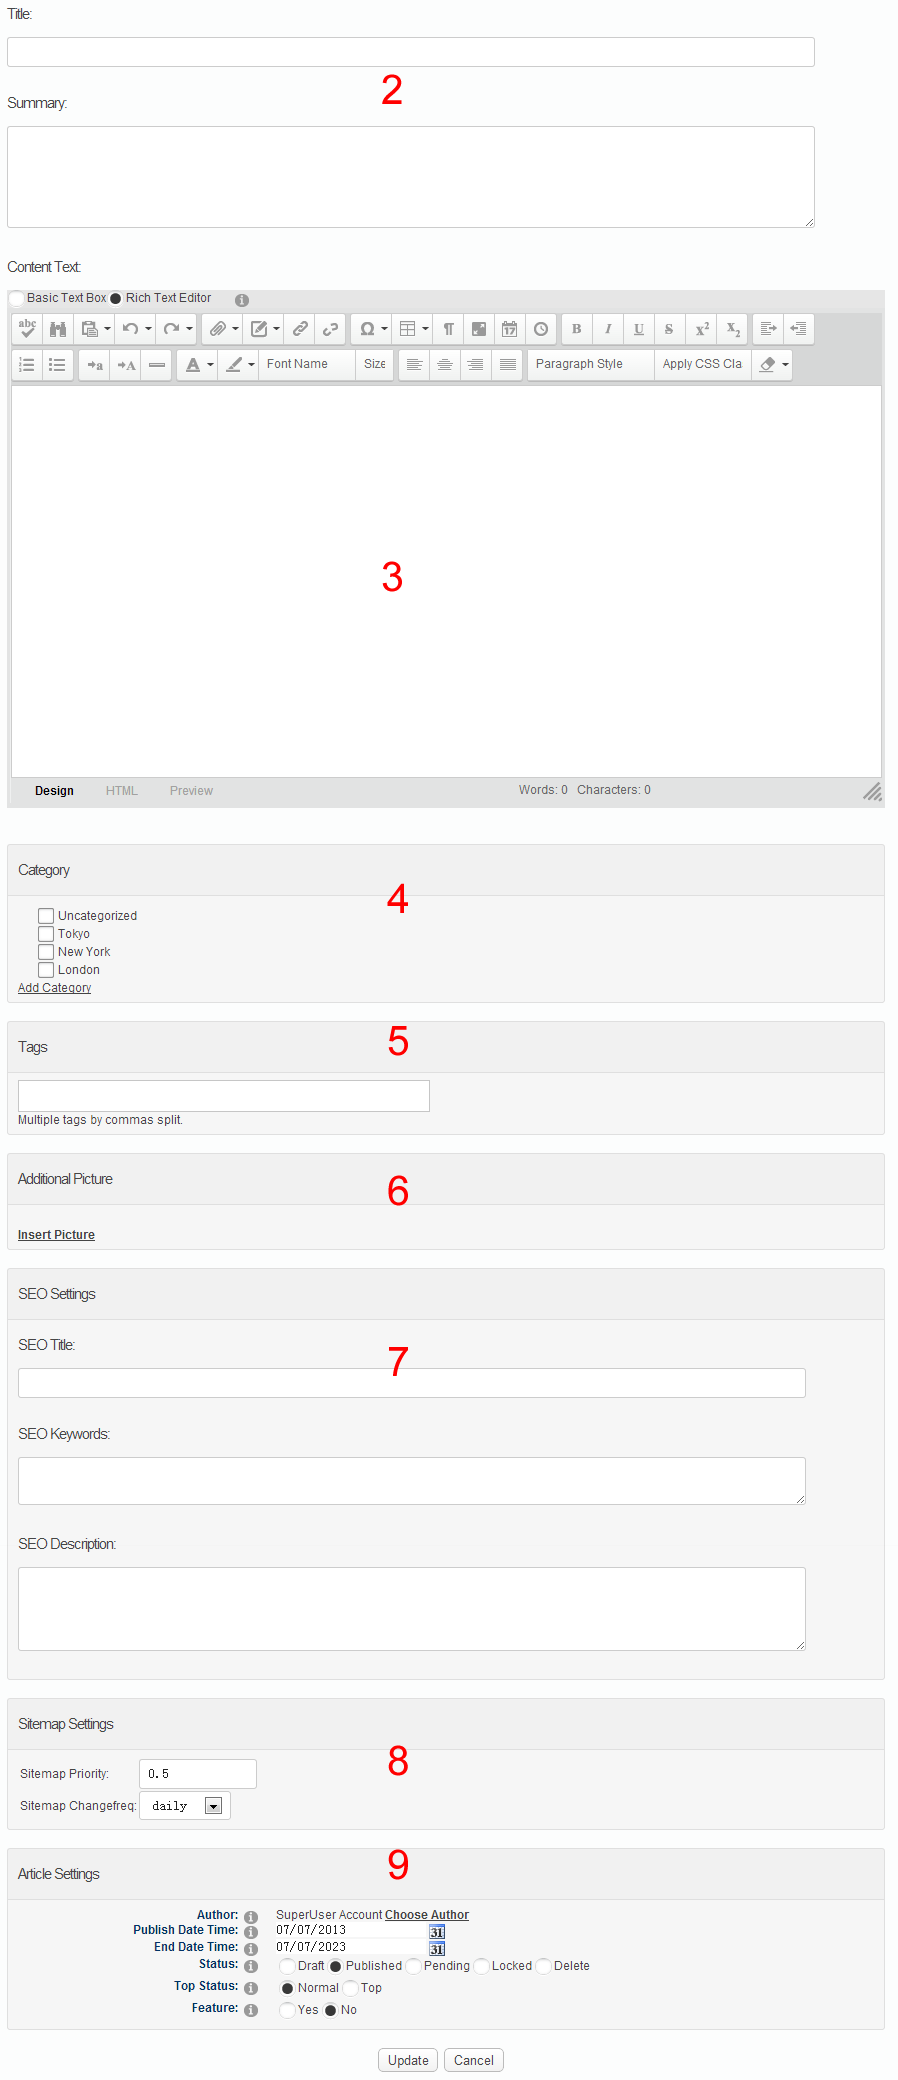
- Enter the photo album title in Title and enter the photo album summary in Summary, the summary will display on the photo album list page.
- Enter the photo album main content in Content Text, it will display on the photo album details page.
- You can add one or more categories for the photo album.
- You can add one or more Tags here, separating the Tags with comma.
- You can set keywords, description etc for each photo album, which will be good for SEO friendly.
- You can set SiteMap for the photo album here.
- Publish Date Time - Set the publish date for the photo album.
Status - Set the status for the photo album.
Display Settings - The article will display on the very top of the article list if you choose Top. - Click Update
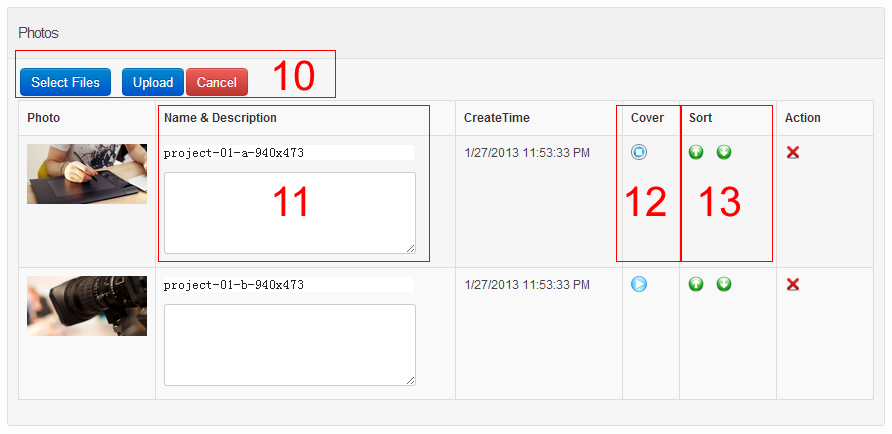
- It will redirect to where to upload the photo after clicking Update, please click Select Files to upload photo, you can upload multiple photos in once.
- You can modify the photo name and description in Name & Description.
- You can specify a photo as the photo album cover in Cover.
- You can sort the photo in Sort.
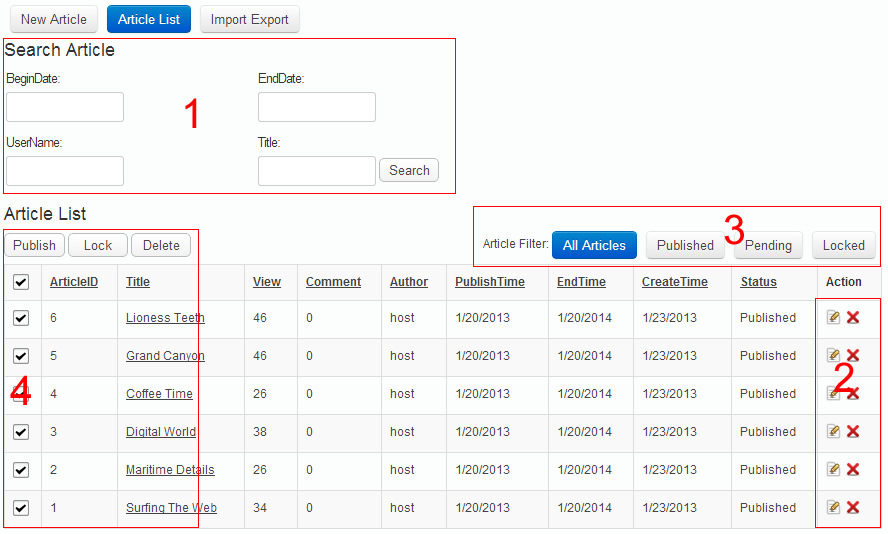
C2. Photo album List
It will display all the photo album when clicking on Manage List button.
- You can edit or delete the existing photo album.
- You can view all the articles under one status.
- You can delete articles in bulk.
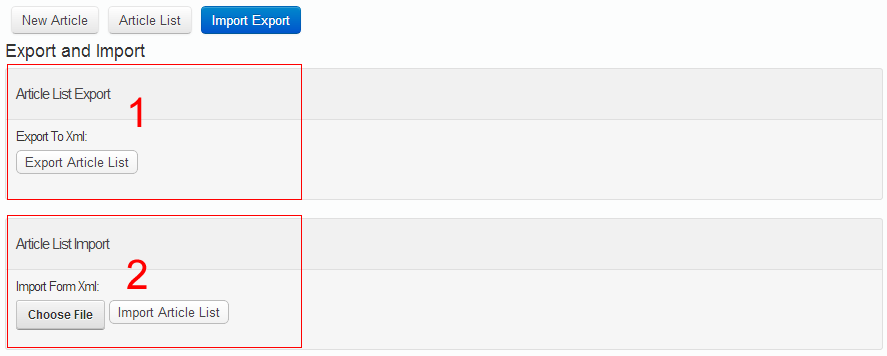
C3. Import Export
You can import all the photo album in one module to another through this function, Except module settings, all the data, tags, pictures, categories can be imported or exported,
- Click Export Article List button, the data will be exported as a XML file.
- Choose an exported XML file, click Import Article List to import the data in this XML file.
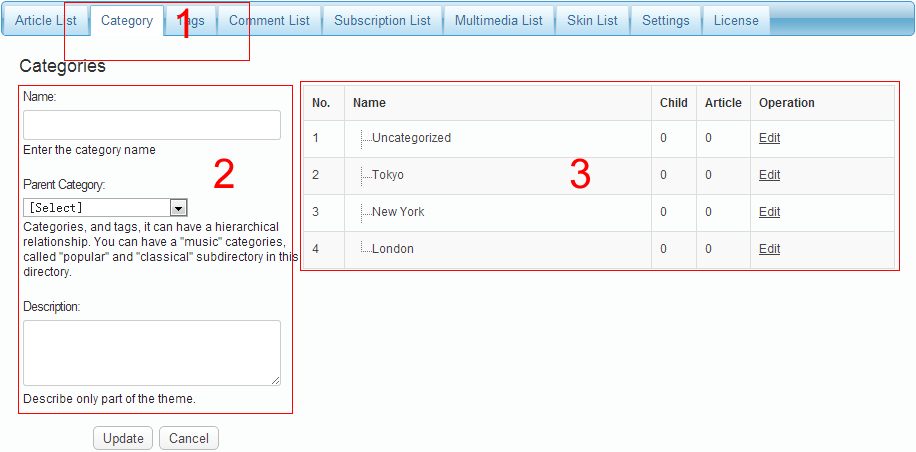
C4. Setting Up New Category
PhotoAlbums module allows to add unlimited categories.
- Click Category button.
- Fill in the category name on the left area.
- The existing categories will display on the right area, you can edit them on Edit click.
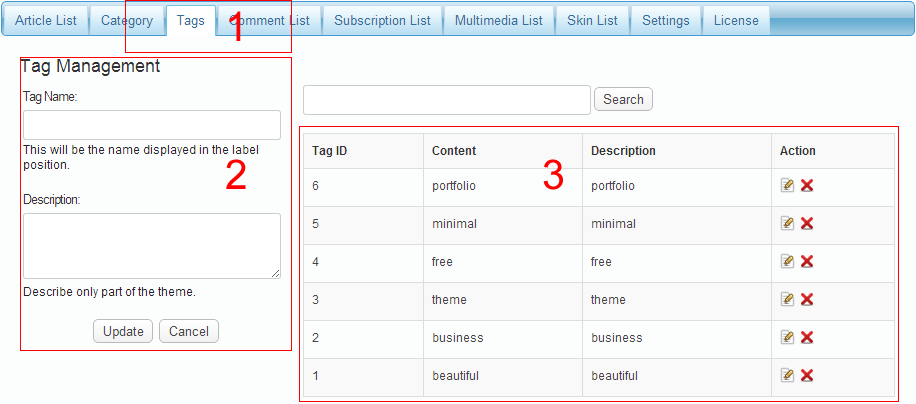
C5. Setting Up New Tag
PhotoAlbums module allows to add unlimited Tags.
- Click Tag button.
- Fill in the Tag name on left area.
- The existing Tag will display on the right area, you can edit or delete this Tag on Edit click.
C6. Comment List
All the article comments will display on Comments List, admin has the ability to delete them, there are various options in Comment Settings.
Approved
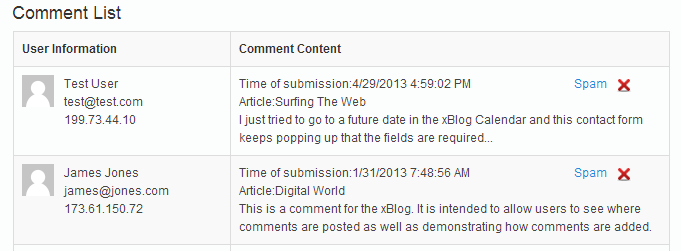
- Approved comments will display on the font end.
- Click Spam button, the comment will be taken as spam and won't be displayed on the front end.
- Click Delete button to delete the unwanted comment forever.
Pending
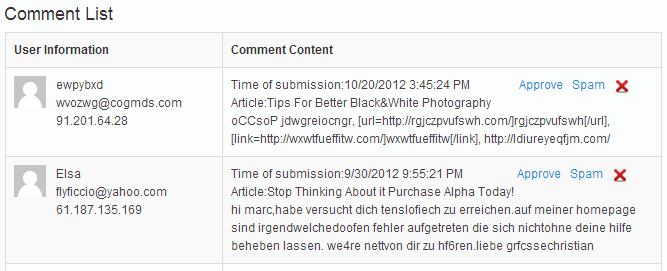
- It stands for comments waiting for approval, they won't be displayed on the front end.
- Click Spam button, the comment will be taken as spam.
- Click Delete button to delete the unwanted comment forever.
- Click Approve button to display the comment on the front end.
Spam
- All the spam won't display on the front end.
- Click Delete button to delete the unwanted comment forever.
- Click Approve button to display the comment on the front end.
Comment Settings
- Enable Comment - whether to display the comment on the album detailed page or not.
- Require login to comment - whether you need to log in to comment or not.
- Enable Comment Notification - whether to enable the comment notification. Both the user and admin will receive an email when some one has commented on an article.
- Number of Comments per page - how many comments will be displayed on each page.
- Comment Initial State - set the initial state for the comment.
- Enable Anti-spam services: It is able to block the spam comments, we strongly suggest you to enable this item. The comment will be taken as approved or spam when this option is enabled, and the previous setting on Comment Initial State won't work any more.
- Anti-spam services - You need to enter Api Key, it will be filled by default, and you can go to Akismet for an application.
C7. Skin Options
The module contains one theme by default, you can enter \DesktopModules\DNNGo_PhotoAlbums\Skins to modify this skin.
Skin List
You can apply the skin by clicking Apply Skin.
Skin Options
You can set the appearance and animated effect for the photo list.
Skin style
You can change the CSS styles for the current skin.
C8. Effect Options
You can set the way how image on photo details page display, 11 animated effects are included.
Effect List
You can choose the desired way to display images on this page.
Effect Options
You can set the appearance and animated effect for the photo list.
Theme style
You can change the CSS styles for the current effect.
C9. Settings
Settings
- Album per page - the number of album display on each page in album list.
- Synidication feeds display the latest - the number of album display on each page in RSS list.
- Display each album in a feed on - whether to display short description or details for the album in RSS list.
- Display Author - whether to display the author info in blog detailed page.
- Author Setting - You can add other user as author to post the album.
Author Roles - . You can set some role as author to post the album.
review new album - When this item is enables, articles by other authors must be reviewed by admin before publishment.
Management Module Roles - Set some role to administrate this module. - Avatars Settings - An avatar is an image that follows you from weblog to weblog appearing beside your name when you comment on avatar enabled sites. Here you can enable the display of avatars for people who comment on your site.
- Sitemap Settings - You can submit Sitemap URL from search engine so it is better for search engine to grasp articles and categories. You can set the weight and update frequency for the album, also you can set up each album separately..
AddThis Settings
You can set the sharing icons on the album details page here.
C10. jQuery Settings
jQuery Enable - When it is enabled, the module will use its own jQuery library, When it is disabled, the module won't load jQuery libray.
D. DNNGO.PhotoAlbums.Search
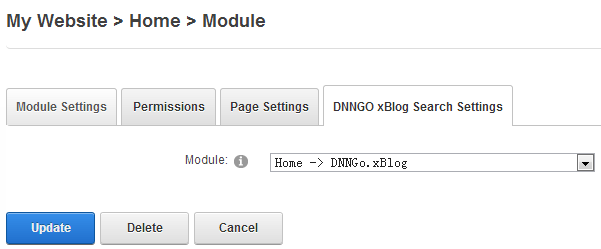
- You need to log in DNN under admin and add DNNGO PhotoAlbums Search to a Pane.
- Click Settings link.
- Click DNNGo_PhotoAlbums Settings, select a main module and click Update.
- You can search the blog album in the main module here.
E. DNNGO.PhotoAlbums.Calendar Module
- You need to log in DNN under admin and add DNNGO PhotoAlbums Search to a Pane.
- Click Settings link.
- Click DNNGo_PhotoAlbums Settings, select a main module and click Update.
- You can view album under a specific date through this module.
F. DNNGO.PhotoAlbums.DashBoard Module
This module contains many functions, like Archive, PhotoList, RankingList, Category, Tags, image rotating effect.
Effect List
- You need to log in DNN under admin and add DNNGO PhotoAlbums DashBoard to a Pane.
- Click Settings link.
- Click DNNGO PhotoAlbums DashBoard Settings, select a main module and click Update.
- Click Effect List.
- DashBoard_Archive - .It is used to display all albums under some months.
- DashBoard_PhotoList - It is used to display the latest albums list.
- DashBoard_Category - It is used to display the categories in the module.
- DashBoard_RankingList - It is used to display the latest albums list.
- DashBoard_Tags - It is used to display the tags in the module.
- Effect_01 - Effect_11 - It is used to set how the image or photo album will display.
Effect Options
- Display number - You can set how many data will display here.
- DataList Type - You can set the display type here, select Album list so the module will read data from the main album, also you can choose a category data here. Select Photo List, then the module will read photo from one album.
- Sequence - You can set the display order for the data here.
Latest - Sorted by the published time.
Hottest Comments - Sorted by the number of the comments.
Hottest View - Sorted by the click frequency.
G. License interface
- You need to go here http://www.dnngo.net and register.
- Please install the module in DNN and add it in a page. Then click the License link to obtain the Machine Key.
- You can send one email to dnnskindev@gmail.com and tell us your Invoice ID, Machine Key and Username. After that, we will generate one piece of license information. If your site is a demo site, the license is still valid when you transfer your demo site to your live site.
- You can go here http://www.dnngo.net/MyAccount/OnlineAuthorization.aspx and manage your license information.
H. Contact Us
If you have any questions or suggestions about modules/skins or modules/skins installation process, please feel free to contact us.
- Website: www.dnngo.net
- Email: dnnskindev@gmail.com
- Skype: dnngo-linda